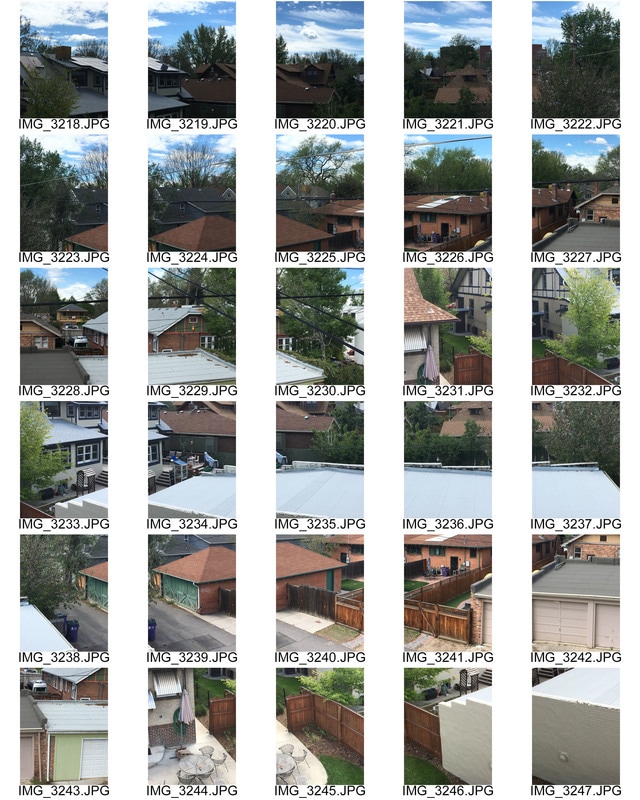
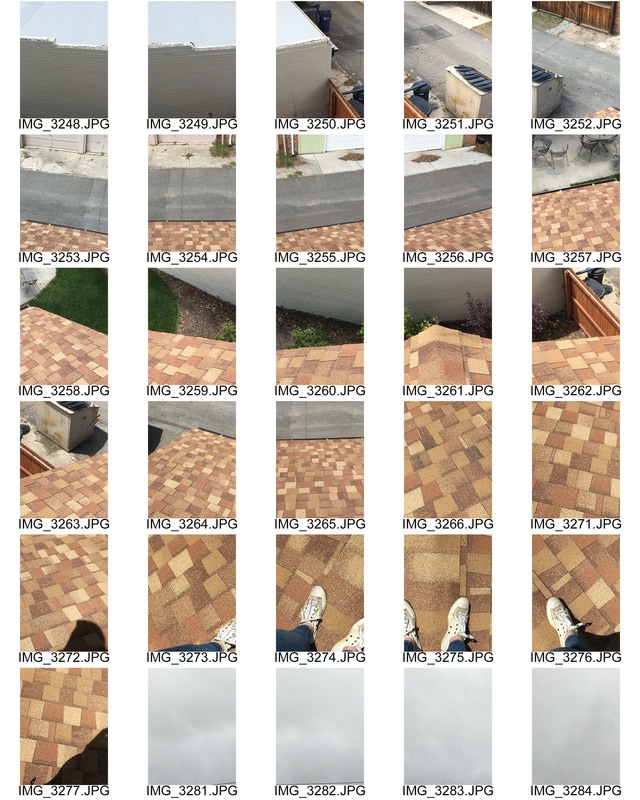
In this project I used aperture to zoom in on different things in each image. I also used shutter speed to capture each individual image as I was panning the whole neighborhood. Since, I was also outside on a cloudy I had to change my white balance to more shady so the buildings didn't turn out a different color than they were originally. Before shooting, I had to figure out where I wanted to stand so I could capture the whole neighborhood. I ended up standing on my garage roof so I could get the photo I wanted which was a birds-eye-view of the houses.
0 Comments
  The mode that I was using, which was Aperture Priority, worked well in this shoot because I was working very close to my model so I needed a low number aperture to fill the frame. A difficult thing when doing the shoot was the lighting outside because it was early in the morning and the sun was casting from weird points on my model so we mostly shot in the shade. Before a shoot you need to plan what time of day you're shooting and where you are shooting and what your model is wearing.
In this activity we were asked to set our cameras on auto and photograph a piece of paper in different lighting. The purpose of this activity was to learn how the camera adjusts to warmer and cooler types of lighting. As you can see in the photos when the lighting was cooler the camera made it so the image was shown as being lighter and when the lighting was warmer the camera would balance the lighting out by adding cooler tones. When photographing portraits on my own I need to change the settings on my camera to either shade, direct sunlight, or auto to ensure that my white balance is correct for my subject.
For this project, we had to take several photos of one subject so when we put all of the photos together it looked like a montage or a collage of photos. We had to take the photos from different angles of the subject in a grid like pattern to make the subject look pieced together. I used a larger F stop to take my photos because I needed to be closer to the tree to take all of the grid like photos. If I were to do this project again I would take more pictures of the landscape so I could make cool shapes when combining all of the photos together.
For the Motion Project, I decided to use the technique of motion blur so that I could get the desired effect that I wanted for my photos. In my photos, I wanted the water to be blurred to show motion in my photos. To take the photos, I used a 1/30 shutter speed to capture the water drops in the photo.
For the Panning Photography, we had to stand in one place and pan with the car we were taking a picture of so that we could capture the car as clear as possible but get the background to be blurry. We wanted the car to be clear and the background to be blurry because we wanted to show the motion of the car/ the speed of the car. We took these photos using the shutter speed of 1/200 to get the photos we wanted.
To take the motion blur photos, we had to use shutter speed at 1/30. This was so the camera would take the picture slower and catch the blur of the photo. We wanted to catch the blur because we wanted to show the action as it was being done at that moment in time.
To take a picture of any action photography, we used shutter speed at 1/400. This was so that we could catch the person in the air and get them little to no blurriness. We took the photo by making the subject jump and then taking the photo while they were in the air.
For this project, we had to tell a story through either taking photos that told a story or by telling a story through making a sequential motion photo. We had to use the continuous mode on our cameras to capture each scene of the motion we were taking photos of. We needed to capture each scene of the motion so we could combine all of the photos into one image to create the effect of the sequential motion. For this project I wanted to convey the emotion of happiness, I showed that through the facial expressions of my model and through the motions she was doing in the photo. My final photos were both pretty strong but if I had to do this project again I would blur the background a little more so the subject (my model) would pop a little more in the photo.
|
AuthorWrite something about yourself. No need to be fancy, just an overview. Archives
May 2017
Categories |


 RSS Feed
